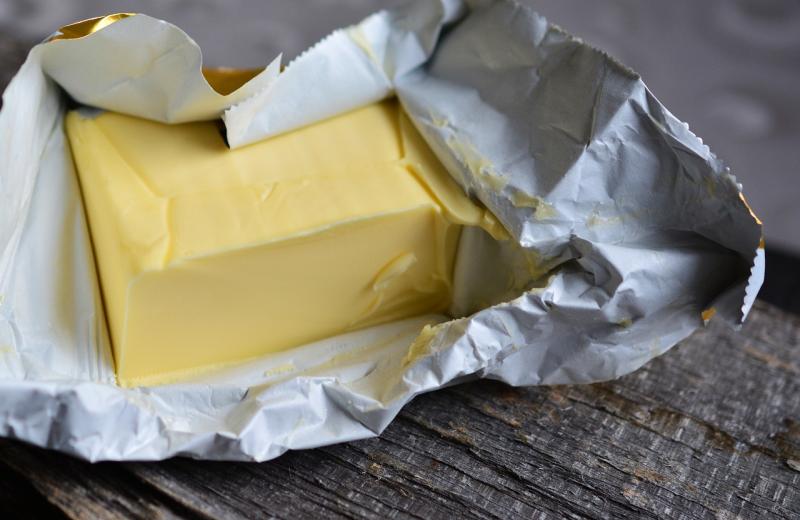
There’s something truly special about Irish butter. Its vibrant golden hue, its rich, creamy texture, and that unmistakably sweet, grassy flavour – it’s a taste of the Emerald Isle in every bite.
While brands like Kerrygold have brought the joy of Irish butter to kitchens worldwide, there’s an unparalleled satisfaction in creating your own. Imagine spreading a thick layer of freshly churned, Irish homemade butter on warm soda bread, knowing you crafted it with your own hands.
This guide will walk you through the simple, yet rewarding process of how to make Irish homemade butter, revealing the secrets behind its distinct character and why it’s a beloved staple in Irish kitchens. Forget searching for “Irish homemade butter near me” – you’re about to become your own artisan butter maker!
The Secret Ingredient: What Makes Irish Butter Different?
Before we dive into the Irish homemade butter recipe, let’s understand what sets Irish butter apart. It’s not just a marketing gimmick; there are fundamental differences rooted in geography, climate, and tradition that give Irish butter its unique qualities.
The primary reason lies with the cows and their diet. Ireland’s lush, green pastures, nourished by abundant rainfall and mild temperatures, allow cows to graze outdoors for a significant portion of the year – often up to 300 days. This grass-fed diet is crucial. The cows consume beta-carotene from the chlorophyll in the grass, which is then transferred to their milk, giving it that characteristic golden colour. This natural pigmentation also contributes to the butter’s richer flavour profile.
Furthermore, Irish butter typically has a higher butterfat content compared to many other types of butter. While standard butter usually contains around 80% butterfat, Irish varieties often hover around 82-84%. This higher fat content contributes to its creaminess, richer taste, and often, a lower water content, making it excellent for baking as well as spreading.
This traditional approach to dairy farming is what imbues Irish butter vs regular butter with its superior taste and texture. It’s a taste of the land, distilled into a golden block.
Gathering Your Golden Irish Homemade Butter Ingredients
Making butter at home requires surprisingly few ingredients, but the quality of each is paramount.
The star of the show is, of course, the cream. To make authentic-tasting Irish butter, you’ll want to aim for the richest, freshest cream you can find. Look for Irish double cream for butter if possible, or a high-quality heavy cream (whipping cream) with a fat content of at least 35%. The higher the fat content, the better your yield and the richer your butter will be. Full-fat, organic cream from grass-fed cows will give you the most authentic Irish flavour. Avoid ultra-pasteurised cream if you can, as it can sometimes be more difficult to churn.
Here’s what you’ll need:
- High-Quality Heavy Cream (or Double Cream): 500ml to 1 litre (about 2-4 cups). Start with 500ml for your first attempt.
- Ice-Cold Water: About 1 cup (for rinsing the butter).
- Salt (optional): 1/4 to 1/2 teaspoon per 500ml of cream, or to taste. Fine sea salt works wonderfully.
Equipment:
- Stand Mixer with Whisk Attachment (recommended for ease) OR:
- Food processor
- Blender
- Large bowl and whisk (manual but a good workout!)
- Butter churn (for the truly traditionalist!)
- Fine-mesh Sieve or Colander: For straining the buttermilk.
- Cheesecloth (optional): For squeezing out extra liquid.
- Spatula or Wooden Spoon: For pressing and working the butter.
- Two Bowls: One for the butter, one for the buttermilk.
Your Step-by-Step Irish Homemade Butter Recipe
This process is straightforward, but it requires a little patience and observation.
Step 1: Chill Your Cream (and Equipment!) While this might seem counter-intuitive after talking about warm grass, the cream should be well-chilled before you start. This helps the fat globules solidify and separate more easily. For best results, chill your mixing bowl and whisk attachment in the freezer for 15-20 minutes before you begin.
Step 2: Start Churning! Pour the cold cream into your chilled mixing bowl. Begin whisking on a medium-low speed to prevent splashing. Gradually increase the speed to medium-high.
You’ll observe several distinct stages:
- Soft Peaks: The cream will thicken and form soft peaks, just like whipped cream. Keep going!
- Stiff Peaks: The peaks will become firmer. You’re still not there, but getting closer. This is where most people stop when making whipped cream.
- Grains and Curdles: This is the magic moment! The cream will start to look grainy, lumpy, and slightly curdled. It will lose its smooth, whipped appearance and begin to look quite unappetizing. Don’t worry, this is exactly what you want. The fat globules are beginning to separate from the buttermilk.
- Separation: Suddenly, you’ll see a distinct separation. Lumps of solid butter will form, and a milky liquid (buttermilk) will pool at the bottom of the bowl. This is the goal! Stop mixing as soon as this happens to avoid overworking the butter.
Chef’s Tip: The entire churning process can take anywhere from 5 to 15 minutes depending on the cream’s fat content, temperature, and your mixing method. Don’t give up!
Step 3: Strain the Buttermilk Carefully pour the contents of your mixing bowl into a fine-mesh sieve or colander set over a second clean bowl. This will separate the solid butter from the liquid buttermilk. Save the buttermilk – it’s a delicious byproduct, perfect for baking soda bread, pancakes, or even drinking! This is real, traditional buttermilk, far superior to the cultured buttermilk you often find in supermarkets.
Step 4: Wash the Butter (Crucial for Shelf Life!) This is perhaps the most important step for achieving good quality, long-lasting Irish homemade butter. You need to wash out any remaining buttermilk from the butter solids. If left in, the buttermilk will cause your butter to spoil quickly and develop an off-flavour.
Transfer the butter solids to a clean bowl. Pour in some ice-cold water, enough to submerge the butter. Using your spatula or wooden spoon, press and knead the butter, working it against the sides of the bowl. The water will turn cloudy as it extracts more buttermilk. Drain the cloudy water.
Repeat this washing process 3-5 times, or until the water runs clear. This indicates that almost all the buttermilk has been removed. You can also use your hands for this, continually pressing the butter under the cold water.
Step 5: Salt Your Butter (Optional) Once the butter is thoroughly washed and drained, press out as much excess water as possible. You can do this by pressing it against the side of the bowl or wrapping it in cheesecloth and gently squeezing.
Now, if you want salted butter, sprinkle your desired amount of salt over the butter and knead it in thoroughly. This not only enhances the flavour but also acts as a natural preservative. For true Irish country butter, a touch of salt is almost always preferred.
Step 6: Shape and Store Your Irish homemade butter is now ready! You can press it into a block using a spatula, or shape it into logs or mounds. Wrap it tightly in parchment paper, plastic wrap, or place it in an airtight container.
Storing Your Golden Creation
How long does Irish butter last? Because your homemade butter contains no added preservatives and has had most of its buttermilk removed, it will last well.
- Refrigerated: Freshly made butter can be stored in the refrigerator for up to 2-3 weeks in an airtight container.
- Frozen: For longer storage, freeze your butter. Wrapped tightly, it can last for several months (up to 6 months) in the freezer. Thaw in the refrigerator before use.
The Benefits of Churning Your Own
Beyond the sheer satisfaction, making your own butter offers several advantages:
- Unbeatable Freshness: You control the ingredients, ensuring the freshest, purest butter possible.
- Superior Flavour: The taste of freshly churned butter is truly incomparable, especially when made with high-quality cream from grass-fed cows.
- Customization: You can adjust the salt content to your exact preference, or even experiment with added herbs or flavourings.
- Buttermilk Byproduct: You get delicious, real buttermilk as a bonus! This is distinct from the cultured buttermilk found in stores and is fantastic for baking.
- Cost-Effectiveness: While the initial cost of good cream can be a factor, if you buy cream in larger quantities, it can be more cost-effective than repeatedly buying premium store-bought butter. This answers the question: Is it cheaper to make your own butter? Often, yes, especially for gourmet quality.
Expanding Your Irish Dairy Horizons
While homemade butter is a revelation, for those seeking specific Irish butter brands, there are excellent options. Kerrygold Butter is indeed real butter, famous worldwide for its grass-fed, golden qualities, and a fantastic example of the Irish dairy industry’s excellence. For those looking for other traditional Irish options, brands like Dromona Butter and Cuinneog butter where to buy can often be found in larger supermarkets or specialist Irish food stores, offering that authentic taste of Irish country butter.
So, next time you’re contemplating a culinary project, consider the delightful art of churning your own Irish homemade butter. It’s a simple process that yields a truly luxurious product, connecting you directly to the rich dairy traditions of Ireland. Enjoy the golden goodness!
Frequently Asked Questions about Irish Homemade Butter
Can I make Irish butter at home?
Yes, absolutely! You can easily make delicious Irish homemade butter at home with just a few ingredients and basic kitchen equipment.
What makes Irish butter different?
Irish butter is primarily different due to the diet of the cows (predominantly grass-fed for a significant portion of the year due to Ireland’s climate) and typically a higher butterfat content (around 82-84% compared to 80% for regular butter). The grass-fed diet contributes to its characteristic golden colour (from beta-carotene) and rich, grassy flavour.
What are the ingredients of Irish butter?
The main ingredient of Irish homemade butter is high-quality, full-fat cream (ideally from grass-fed cows), which is churned until the fat separates from the buttermilk. Salt is usually added to taste for flavour and preservation.
What makes Irish butter so yellow?
Irish butter is so yellow due to the high beta-carotene content in the grass that Irish cows predominantly graze on. This natural pigment is absorbed by the cows and transferred to their milk fat, giving the butter its vibrant golden hue.
Is it cheaper to make your own butter?
It can be cheaper to make your own butter, especially if you compare it to purchasing high-end, grass-fed Irish butter. The cost depends on the price of the heavy cream you buy and the amount of butter you produce from it. Generally, buying cream in bulk and making your own can be cost-effective.
What’s the best cream for making butter?
The best cream for making butter is a high-quality, full-fat heavy cream or double cream (with at least 35% butterfat). Cream from grass-fed cows is ideal for achieving that authentic Irish flavour and colour. Avoid ultra-pasteurized cream if possible, as it can sometimes be harder to churn.
Is Kerry Gold Butter real butter?
Yes, Kerrygold Butter is real butter. It is a well-known brand of Irish butter celebrated for being made from the milk of grass-fed cows, contributing to its rich flavour and golden colour.
How long does Irish butter last?
Homemade Irish butter, stored properly in an airtight container in the refrigerator, can last for 2-3 weeks. If frozen, it can last for several months (up to 6 months) without significant loss of quality.
Is Irish butter healthier than regular butter?
Many proponents argue that Irish butter, being predominantly from grass-fed cows, may be healthier than regular butter. Grass-fed dairy products tend to have a higher content of beneficial nutrients like Omega-3 fatty acids, conjugated linoleic acid (CLA), and fat-soluble vitamins (A, E, and K2) compared to butter from grain-fed cows. However, all butter is high in saturated fat and should be consumed in moderation.